Windows Installation Guide
This guide walks through installing the DNAGedcom Client on Windows, including how to handle the Microsoft Defender SmartScreen warning and the User Account Control (UAC) prompt that Windows shows for any newly downloaded installer.
Stuck on a Windows warning right now? Here's what to click:
- Edge / Chrome “Make sure you trust… before you open it” (Cancel + Delete ▼): the file is in “quarantined” state. The Keep button is hidden inside the dropdown arrow next to Delete. Click the ▼ next to Delete, then click Keep. (Don't click Cancel or Delete — both throw the file away.)
- Older browser “isn't commonly downloaded” bar: click Keep directly in the download bar, or open the ··· menu next to the download and choose Keep.
- Blue “Windows protected your PC” dialog on launch: click More info on the left, then click the Run anyway button that appears.
- User Account Control prompt: click Yes.
That's the whole thing. The MSI is signed and is run through three independent virus scanners before each release. See Step 2 below for screenshots.
System requirement: Windows 10 or Windows 11 (64-bit). The installer is an MSI package. You'll need administrator rights on the machine to install (the standard one-time UAC prompt).
Step 1: Download the Installer
Download the latest installer from the link below:
Download DNAGedcom Client for Windows
The file will be named DNAGedcomInstaller4.msi and will appear in your browser's downloads bar and your Downloads folder.
Step 2: Bypass Microsoft Defender SmartScreen (if shown)
This is normal — click through it. Microsoft Defender SmartScreen flags any installer that hasn't been downloaded by enough Windows users yet as “not commonly downloaded,” so every new DNAGedcom release triggers it. The MSI is signed and is run through three independent virus scanners before publication.
You may see one or two warnings depending on your browser and Windows version. Here's exactly what to click for each:
2a. Browser warning: “Make sure you trust … before you open it”
Modern Microsoft Edge and Chromium-based browsers show a takeover panel like this when SmartScreen flags the download:
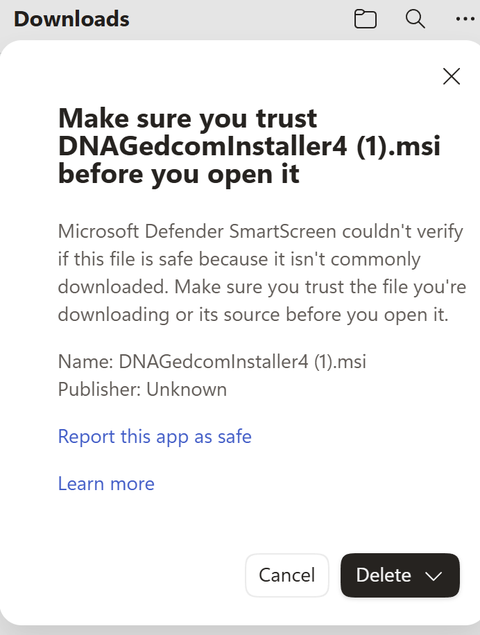
Important: the obvious buttons (Cancel and Delete) both delete the file. The Keep option is intentionally buried inside the small ▼ arrow next to Delete — this is how Microsoft makes you think twice before keeping a flagged download.
To keep the file:
- Click the small ▼ dropdown arrow on the right side of the Delete button.
- From the dropdown menu that opens, choose Keep.
- You may see a follow-up confirmation (“Are you sure?” or similar) — click Keep anyway or Show more → Keep anyway.
- The file is now in your Downloads folder. Double-click
DNAGedcomInstaller4.msito run it.
If your browser shows the older-style download bar instead (“DNAGedcomInstaller4.msi isn't commonly downloaded. Make sure you trust DNAGedcomInstaller4.msi before you open it.” with a Keep button visible), just click Keep directly. Or, if Keep is hidden, open the ··· menu next to the download and choose Keep from there.
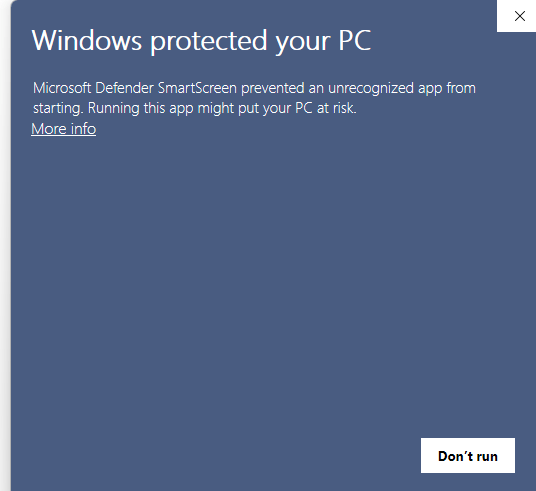
2b. Windows SmartScreen dialog: “Windows protected your PC”
When you launch the installer, Windows shows a blue dialog with only one visible button: Don't run. Don't click it. Instead:
- Click More info on the left side of the dialog.
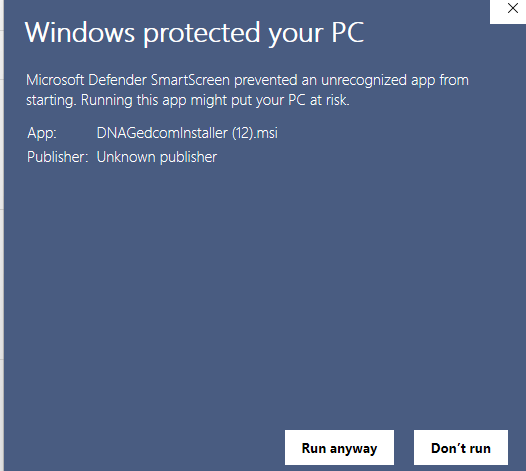
- The dialog expands to show the file name (
DNAGedcomInstaller4.msi) and a new Run anyway button. - Click Run anyway.
Why does this happen? Microsoft Defender SmartScreen builds a “reputation” for each installer based on how many times it's been downloaded across all Windows machines. Smaller-vendor software like DNAGedcom never accumulates enough downloads to clear the threshold, so every new release looks “new” to SmartScreen.
Step 3: Run the Installer
The installer is a small wizard. The first screen welcomes you to the setup:
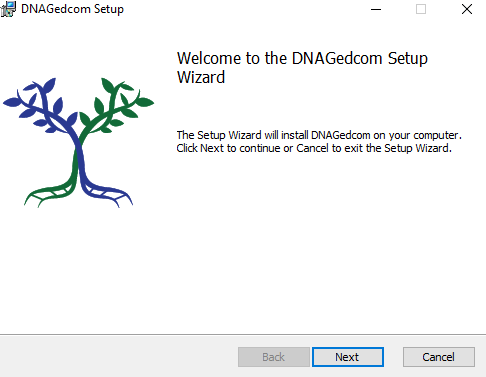
Click Next.
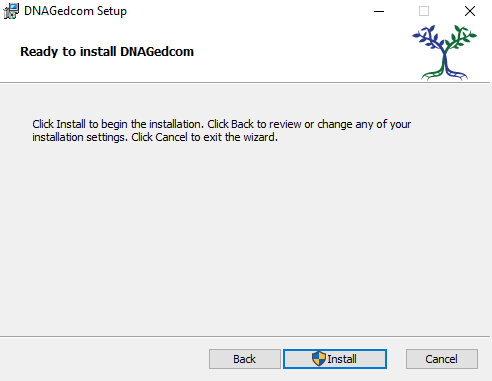
Step 4: Confirm and Install
The next screen asks for confirmation before copying files. Click Install.
Step 5: Approve the User Account Control Prompt
Windows shows a User Account Control (UAC) prompt asking whether you want to allow this app to make changes to your device. Click Yes.
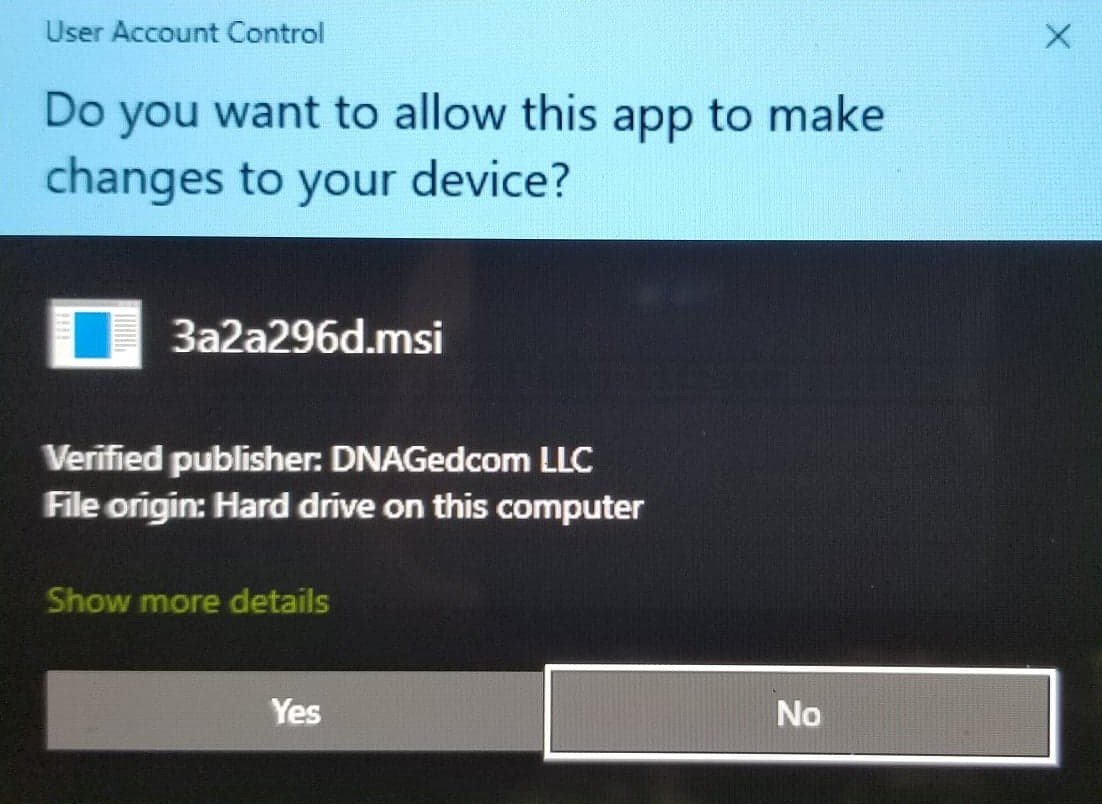
This is the standard Windows prompt for any software installer that writes to C:\Program Files. DNAGedcom doesn't need any unusual privileges — just the same install permission every other Windows app uses.
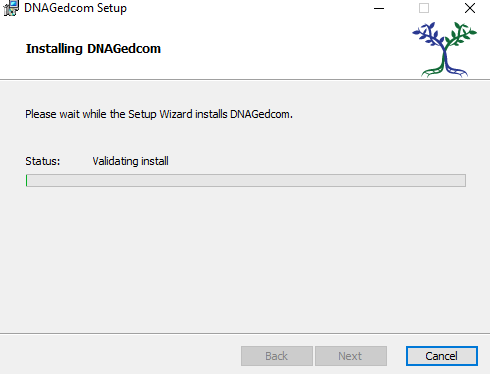
Step 6: Wait for the Files to Copy
The installer copies files to C:\Program Files\DNAGedcom\. This usually takes under a minute.
Step 7: Finish
When the wizard reports success, click Finish.
Find DNAGedcom Client in your Start menu, or use Windows search (Win key + type “DNAGedcom”).
Step 8: Initial Setup
Once the app is running:
- Log in with your DNAGedcom credentials.
- Click the gear icon in the top-right to open Settings.
- Choose a database folder. The Client's default location is a hidden Windows folder under
%LocalAppData%\DNAGedcom, which most users can't easily find later for backup. We strongly recommend changing this on first launch —Documents\DNAGedcomworks well for most people. - Give your database a name (optionally include the tester's name for kits you manage for others).
- Click Save.
You're now ready to start gathering DNA data. See the Getting Started guide for a full walkthrough.
Antivirus and Firewall Notes
DNAGedcom Client uses an embedded Chromium browser to log in to DNA testing services and download your data. On first launch the Client extracts the Chromium binaries into %LocalAppData%\DNAGedcom\BrowserData\. A handful of antivirus products (especially on Windows 10) flag this extraction as suspicious because it looks like a program writing executables to AppData — a pattern some malware also uses.
If your antivirus blocks the extraction, you'll usually see one of two symptoms on next launch:
- A
ChromiumBinariesMissingExceptionerror, or - A
GZipCompress.exe has exited with code 1error.
The fix is to add an antivirus exception for %LocalAppData%\DNAGedcom\ and let the Client re-extract the binaries:
- Close DNAGedcom completely.
- In your antivirus software's settings, add an exclusion (sometimes called an “allow list” or “exception”) for the folder
%LocalAppData%\DNAGedcom\. - Open File Explorer and paste
%LocalAppData%\DNAGedcom\BrowserData\into the address bar. - Delete the binaries folder inside
BrowserData. - Relaunch DNAGedcom — it will re-download and extract a fresh copy of the browser components on startup.
Windows Firewall normally allows the Client through automatically. If gathering fails to reach DNA testing services, check that DNAGedcom.exe is allowed for both Private and Public networks in Windows Security > Firewall & network protection > Allow an app through firewall.
Troubleshooting
That's modern Edge's SmartScreen UI. The Keep option is intentionally hidden inside the small ▼ dropdown arrow on the right side of the Delete button. Click that arrow, then choose Keep. If a confirmation appears, click Keep anyway (you may need to expand a Show more link first). Don't click the big Cancel or Delete buttons — they both throw the file away.
See Step 2a above for the screenshot.
Same root cause as the takeover panel above — Microsoft Defender SmartScreen flags installers without an established download reputation. If your browser shows a Keep button directly, click it. If you only see Cancel / Delete, look for the ▼ dropdown arrow next to Delete (see Step 2a). Then proceed with Step 3.
That's by design — Microsoft Defender SmartScreen hides the Run button on the first screen to make sure you don't click through reflexively. Click More info on the left side of the dialog to reveal the Run anyway button (see Step 2 above).
See “Antivirus and Firewall Notes” above. The fix is to add an antivirus exception for %LocalAppData%\DNAGedcom\, delete the BrowserData\binaries folder, and relaunch.
A few common causes:
- An older version is still installed. Open Settings > Apps, search for “DNAGedcom,” and uninstall the old version first, then re-run the installer.
- Antivirus quarantined a file mid-install. Add a folder exclusion for
%LocalAppData%\DNAGedcom\andC:\Program Files\DNAGedcom\, then re-run. - Disk is out of space on the system drive. The installer needs ~250 MB free for first launch (the Client itself plus the embedded Chromium).
If none of those apply, email support@dnagedcom.com with the exact error text and your Windows version.
Open Settings > Apps > Installed apps, find DNAGedcom, click the menu next to it, and choose Uninstall. The database file in your Documents folder (or wherever you put it) is left in place — remove it manually if you want to delete your gathered data. The browser components in %LocalAppData%\DNAGedcom\BrowserData\ can also be deleted manually if you want to free up the disk space.
Need help? Email support@dnagedcom.com and include your Windows version (10 or 11), your DNAGedcom username, the Client version, and the log file from the Settings page.